Explore 5 real-world examples that demonstrate the best practices for using React Suspense. See how React can transform your app’s UX and performance.
We’ll display a fallback UI while a lazy component is loading and suspense layouts for split-coded routes.
The third example is the most interesting. It shows how to display a loading state while data is fetching in a Suspense-enabled setup.
Each example demonstrates a practical use case for React Suspense and its benefits in real-world scenarios. I included the code sources for each example.
Let’s dive in!
What is React Suspense?
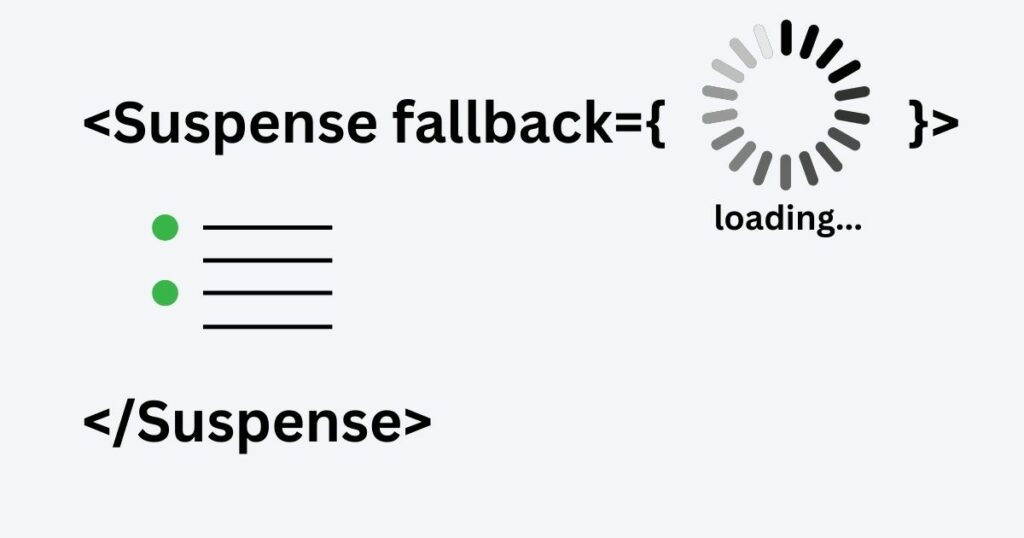
React Suspense is a component in React that allows inner components to “suspend” rendering while they wait for some asynchronous operation to complete.
This feature makes your app feel faster and smoother. It improves user experience by showing skeletons and loaders while the page waits for data instead of a blank component.
Without React Suspense, you can still manage data fetching in React using useEffect and updating the status state based on the fetched result. Something like:
if (isLoading) show <Spinner />; else return <Component />
The Suspense component lets you eliminate these checks in the components and let it deal with displaying the fallback instead.
Asynchronous Data
Imagine you are developing a Profile page that needs to display user information like name, email, and phone number.
To render this page, you must get user data. We can request and retrieve data stored in external applications or databases.
A common example of asynchronous data is fetching data from an API, such as your global data store, a database, or a third-party API.
In this article, I will get data from the JSONPlaceholder project, a free online REST API for testing. This service provides endpoints for retrieving mock data.
What is a React Fallback UI?
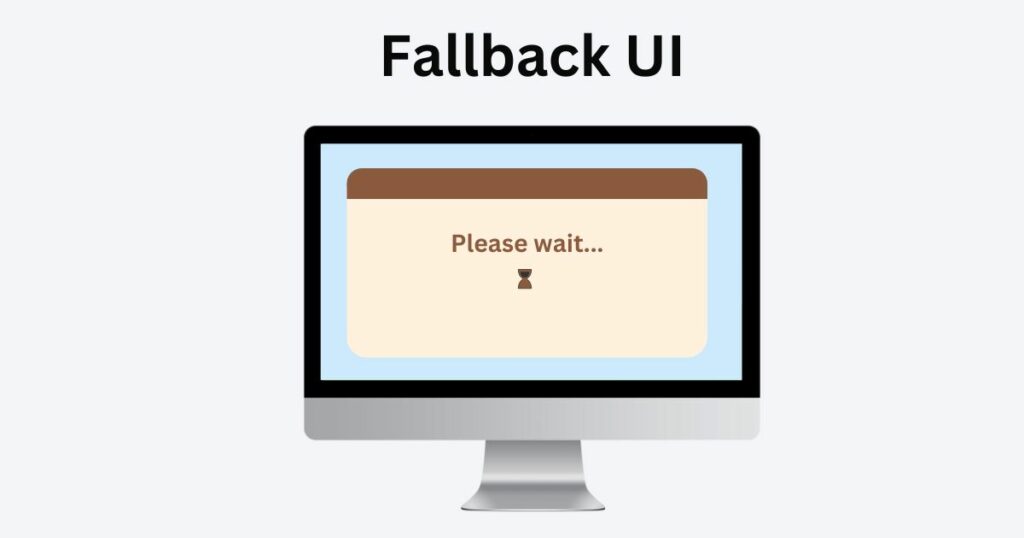
When the component receives data, we want to show something on the screen while it’s loading. This could be a loading spinner, a progress bar, or a message like “Please wait…”.
I use these elements to help users understand that the page is still loading and the content is coming. It also shows that the app hasn’t frozen or crashed.
React Fallback UI is a temporary interface (a placeholder) that users see on a website while the data is loading.
How Does React Suspense Work?
Let’s get back to imagining a Profile page. As we discussed, this component is fetching asynchronous data.
When a Profile component encounters an asynchronous operation, the React Suspense signals to React to suspend the rendering of a Profile component.
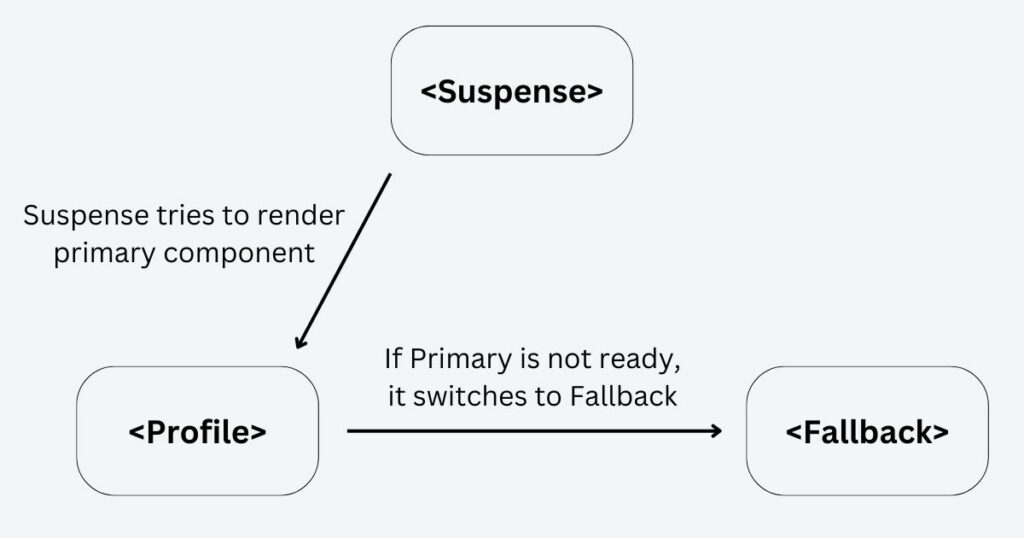
React pauses the rendering of that Profile component and its subtree (all children components), allowing other UI parts of the page to render.
Instead of the Profile component, React renders a Fallback UI defined on the closes Suspense component. This shows that something is happening in the background and that content is loading.
Once the data is fetched, React returns to the suspended component and renders it seamlessly without interruption.
5 Real Use Cases For Implementing React Suspense
I collected five real-world use cases where implementing React Suspense makes sense.
In these cases, I use React Suspense for simple lazy loading of components, fetching data in a Suspense-enabled setup, and route based code splitting.
Example 1: Show a Fallback While A Lazy Component Is Loading
Imagine you have a large React component that takes a while to load. It may import a lot of code or fetch data. Let’s name it the SlowComponent.
To improve the application’s performance, I use React.lazy to “lazy load” the SlowComponent.
Lazy Load
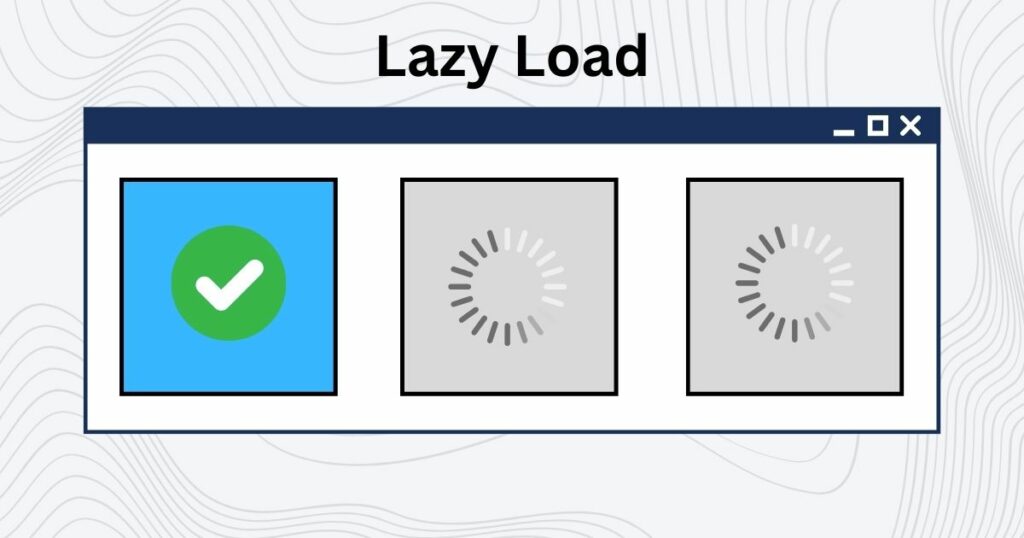
When you lazy load a component, it is only loaded when needed. This means the React renders a component not immediately. Instead, it loads asynchronously when it is needed on the screen.
Lazy loading improves your React app by reducing the initial bundle size and only loading the code when required.
In the example, I want to lazy load the SlowComponent and use React Suspense to show a fallback UI until the component is ready.
While SlowComponent is loading, I will display the <div>Loading...</div>. Once SlowComponent is loaded — React renders it in place of the fallback.
React Suspense Component Fallback Prop
Use the fallback prop of the Suspense component to define the fallback UI. React will use it to show while the suspended component is loading.
This prop accepts a React element, which can be any valid React component or JSX code.
Implementation of Example 1
This is a basic implementation of a lazy loading of a SlowComponent component loading. Get a full code here.
First, import the lazy function from React. Create the SlowComponent component by calling lazy and passing a dynamic import of your component.
Now, in your JSX, you can render SlowComponent within the Suspense component. Provide a fallback prop that defines UI placeholder as <div>Loading...</div>.
export default function App() {
  const SlowComponent = React.lazy(() => import("./LazyComponent"))

  function SuspenseComponent() {
    return <div>Loading...</div>;
  }

  function Lazy() {
    return (
      <React.Suspense fallback={<SuspenseComponent />}>
        <SlowComponent />
      </React.Suspense>
    );
  }

  return (
    <div className="App">
      <h1>Hello CodeSandbox</h1>
      <h2>Start editing to see some magic happen!</h2>
      <Lazy />
    </div>
  );
}
Let’s simulate a long-time loading component for demo purposes. I will update the lazy import to include the setTimeout. Update the current lazy import:
const SlowComponent = React.lazy(() => import("./LazyComponent"))
to this updated import with a setTimeout function:
const SlowComponent = React.lazy(() =>
  import("./LazyComponent").then((module) => {
    return new Promise((resolve) => {
      setTimeout(() => {
        resolve(module);
      }, 2000);
    });
  })
);
Here, setTimeout adds a 3000 milliseconds (3-second) delay to the loading of SlowComponent. It visually demonstrates the behavior of a component that takes some time to load.
React will render the <div>Loading...</div> fallback UI component during the delay. It will provide visual feedback to the user that the component is loading.
Example 2: Provide Suspense Layouts For Route Based Code Splitting
Route based code splitting improves the performance of your React application by splitting the code into smaller, more manageable chunks. React will load them only when the user navigates to the specific page.
You can define Suspense boundaries around each route component and provide a fallback UI for each route.
Another option is to use a suspense layout for several components. This lets me define a shared placeholder for multiple components.
You can also simply wrap the whole Router with the React Suspense to provide a global fallback for the entire application. Show a consistent loading indicator for the entire app, regardless of which route or component is loading!
Implementation of Example 2
Let’s explore how to use a React.Suspense to manage the loading states of multiple components. Here, you’ll find the code source.
In the example # 1, I used the React.lazy function along with setTimeout to simulate an asynchronous delay. I’ve now extracted this logic into a lazyLoadComponent function to make this pattern more reusable.
const lazyLoadComponent = (path, delay) => {
  return React.lazy(() =>
    import(path).then((module) => {
      return new Promise((resolve) => {
        setTimeout(() => {
          resolve(module);
        }, delay);
      });
    }),
  );
};
This demonstrates how to split-code routes with suspense layouts, including global UI fallback.
// Think of these Home, About, Profile, and Payments components
// as "pages" in your app.

const Home = lazyLoadComponent("./Home", 2000);
const About = lazyLoadComponent("./About", 1000);
const Profile = lazyLoadComponent("./profile/Profile", 3000);
const Payments = lazyLoadComponent("./Payments", 1000);

const SuspenseLayout = () => (
  <React.Suspense fallback={<>***Layout Fallback***</>}>
    <Outlet />
  </React.Suspense>
);

const NavMenu = () => (
  <>
    <ul>
      <li>
        <Link to="/">Home</Link>
      </li>
      <li>
        <Link to="/about">About</Link>
      </li>
      <li>
        <Link to="/profile">Profile</Link>
      </li>
      <li>
        <Link to="/payments">Payments</Link>
      </li>
    </ul>
    <hr />
  </>
);

export default function BasicExample() {
  return (
    <>
      <React.Suspense fallback={<>***Global Fallback***</>}>
        <Router>
          <NavMenu />
          <>
            <Routes>
              <Route path="/" element={<Home />} />
              <Route
                path="/about"
                element={
                  <React.Suspense fallback={<>***Route Fallback***</>}>
                    <About />
                  </React.Suspense>
                }
              />
              <Route element={<SuspenseLayout />}>
                <Route path="/profile" element={<Profile />} />
                <Route path="/payments" element={<Payments />} />
              </Route>
            </Routes>
          </>
        </Router>
      </React.Suspense>
    </>
  );
}
I lazily load the About, Home, and Profile components with the React.lazy function.
Inside the Router component, a Route component specifies a path and an element to render when that path matches the current URL. For example, React will display the Home component if a user navigates to the index “/” path.
I use React Suspense to provide a fallback UI (...SuspenseLayout...) for a group of “/profile” and “/payments” routes. This lets you define a common loading state for multiple related pages to provide consistent feedback!
The <Outlet /> component is a placeholder where Suspense will render the child component.
Lastly, by wrapping the entire application with <React.Suspense>, I ensure that users always see the fallback UI when loading any components. Even for those components that do not have a personal or layout suspense.
In this case, the index route “/” is such a route. That is why we see a global fallback when navigating to the index route.
The result –– each component loads independently! A user does not need to wait for all components to load before displaying the content. This is due to a code splitting at the routing level, where React lazily loads each route when accessed.
Example 3: Display a Loading State While Data Is Fetching in Suspense-Enabled Setup
In this example, we’ll demonstrate how to use React Suspense to manage the loading state while fetching data for a component.
When a user navigates to a route that requires data fetching, we’ll use Suspense to display a loading state until the data is available.
First, let’s walk through the common data fetching patterns so that you can make informed decisions about managing data in a React app.
React Component Data Fetching Patterns
There are two main approaches: the Traditional approach (Fetch-on-render) and the Suspense approach (Render-as-You-Fetch).
Traditional Approach (Fetch-on-render)
This is the typical data fetching approach with lifecycle methods (such as componentDidMount or useEffect).
As the name says (Fetch-on-render), React first renders the component and then starts fetching data. In other words, data fetching doesn’t begin until the component’s initial render.
function fetchUsers() {
  return (
    //... Promise with data
  );
}

function DataComponent() {
  const [data, setData] = useState(null);

  useEffect(() => {
    const interval = fetchUsers().then((result) => {
      const interval = setTimeout(() => {
        setData(result);
        return interval;
      }, 3000);
    });

    return () => {
      clearTimeout(interval);
    };
  }, []);

  if (!data) {
    return <div>Fetching After Initial Render...</div>;
  }

  return (
    <div>
      <h1>{data.name}</h1>
      <p>email: {data.email}</p>
      <p>phone: {data.phone}</p>
    </div>
  );
}

export default function App() {
  return <DataComponent />;
}
Inside the DataComponent, the useEffect hook fetches data. When the component initially mounts, it gets data and updates the data state with the result.
A setTimeout simulates a 3000 milliseconds (3 seconds) delay in receiving data.
The initial value of data is set to null, and the DataComponent has a conditional check. This check ensures that React renders a fallback UI when data it is null (i.e., data is being fetched).
if (!data) {
  return <div>Fetching After Initial Render...</div>;
}
The check ensures that React renders a placeholder UI when data is nullish (i.e., data is being fetched).
This is the most popular approach to fetch data asynchronously in a React component using hooks.
It was the first approach I’ve learned, too! And I used it a lot on real-world commercial projects.
However, this can lead to a common waterfall problem. If there are inner components that also rely on remote data, they won’t start fetching until their parent component has finished fetching its data.
This sequence can result in slower initial render times and a less responsive user interface. Especially when several components need to fetch data independently.
Suspense Approach (Render-as-You-Fetch)
DataComponent
The Suspense approach allows components to start rendering with a fallback UI while fetching the data. A component renders with a placeholder while waiting for the data.
It makes components more responsive and provides meaningful content sooner, even if the data is unavailable.
import { fetchData } from "./api";

const profileData = fetchData("https://jsonplaceholder.typicode.com/users/1");

function DataComponent() {
  const data = profileData.read();

  return (
    <div>
      <h2>{data.name}</h2>
      <p>email: {data.email}</p>
      <p>phone: {data.phone}</p>
    </div>
  );
}

export default function Profile() {
  return <DataComponent />;
}
Inside <DataComponent />, I do not need to use any loading state checks or fire a network request inside a useEffect. It looks much cleaner than in the traditional fetch-on-render way.
Suspense simplifies managing loading states and provides a more seamless user experience.
Yes, we need to add extra code to make it work with the Render-as-You-Fetch approach. Out of the box, the Suspense component does not know whether an asynchronous function succeeded or failed.
I added a wrapper (suspender) around the Axios Promise that provides a ready method. This method tells Suspense if it needs to display a fallback or if the data is here and React can finally render the content.
Implementation: Data Fetching With React Suspense
Let’s start with a basic App component that renders the heading “My App!” and wraps the Profile component inside a React Suspense component.
import React from "react";
import Profile from "./Profile";

export default function App() {
  return (
    <>
      <h1>My App!</h1>
      <React.Suspense fallback={<div>Loading...</div>}>
        <Profile />
      </React.Suspense>
    </>
  );
}
I used <div>Loading...</div> as a Fallback UI display while the Profile component was loading.
In the Profile component, I import a custom fetchData API handler and use it to hit one of a JSONPlaceholder’s endpoints. This endpoint returns one user’s information, including name, email, and phone number.
import { fetchData } from "./api";

const profileData = fetchData("https://jsonplaceholder.typicode.com/users/1");

function DataComponent() {
  const data = profileData.read();

  return (
    <div>
      <h2>{data.name}</h2>
      <p>email: {data.email}</p>
      <p>phone: {data.phone}</p>
    </div>
  );
}

export default function Profile() {
  return <DataComponent />;
}
The fetchData function returns the read method, which either gives the fetched result or suspends the component if the data is not there yet.
I use the read method to “read” the result of the fetchData promise. React suspends the component if the promise is still pending and displays a fallback UI.
And this is what the fetchData function looks like:
function fetchData(url) {
  const promise = axios
    .get(url)
    .then((response) => {
      return response.data;
    })
    .catch((error) => {
      throw error;
    });

  return promiseResolver(promise);
}
Nothing is special—it’s a regular promise wrapped into the promiseResolver.
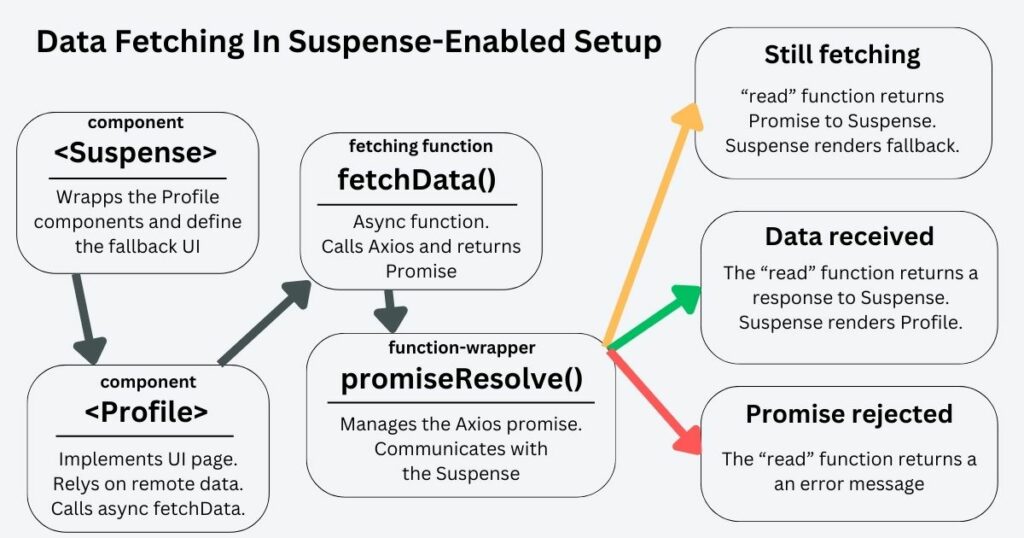
promiseResolver is a wrapper function that manages the promise and communicates with the Suspense component. It handles three possible outcomes of the Axios Promise:
- Suspending the Component: When the data is unavailable, promiseResolver suspends the component by returning the processing promise.
- Rejecting the Promise: If the Promise encounters problems, promiseResolver throws an error.
- Resolving the Promise: promiseResolver returns the result of the Promise if it resolves successfully.
The last key is the promiseResolver or a promise wrapper function.
function promiseResolver(promise) {
  let status = "pending";
  let response;

  promise.then(
    (res) => {
      setTimeout(() => {
        status = "success";
        response = res;
      }, 3000);
    },
    (err) => {
      status = "error";
      response = err;
    }
  );

  const read = () => {
    if (status === "pending") throw promise;
    if (status === "error") throw response; // this response would be an error message from line 16
    return response;
  };

  return { read };
}

export { fetchData };
The promiseResolver function initializes two variables: status and response. I’ll use them to track the status of the Promise and its eventual result.
Then, I used the method to attach two callbacks to the Axios Promise.
- The first callback fires when the Axios Promise resolves successfully. It sets the status to “success” and saves the response.
- The second callback fires when the Axios Promise is rejected, setting the status to “error” and putting the error message in the response variable.
The promiseResolver function returns an object with a read method. I use it to interact with the wrapped Promise.
- If the Promise is still pending (status === “pending”), the read method throws the Promise itself, indicating that the data is not yet available.
- If there is an error (status === “error”), the read method throws an error response.
- Finally, the read method returns the response if the Promise was resolved. This lets the Suspense component know the data once it is available, and it can switch to rendering a child instead ( which is the Profile component).
When the App component mounts for the first time, React tries to render the Profile component, which calls the fetchData() function. While the data is loading, the promiseResolver is talking to the Suspense component.
I love this pattern because it allows each component to render once its data is available. It promotes a more reactive programming model since we declare our requirements and let React manage the loading and error states for us.
With React Suspense, I can focus on defining what data our components need rather than how to fetch and handle that data. It leads to a more maintainable codebase and results in better UX.
Example 4: Reveal Nested Content As They Are Ready
In web development, rendering components that rely on asynchronous data can delay displaying content. To avoid this, I often use a strategy to render components as they are ready.
This strategy involves lazily loading components and progressively revealing them in the UI as they are ready.
I have three nested components in the example: ProfileImage, ProfileDetails, and ProfileControllers. Each is lazily loaded using React.lazy, with a simulated delay to mimic asynchronous data fetching.
Implementation of Example 4
This approach progressively renders nested components and their data.
Inside the Profile component, I wrapped each nested component in a separate React Suspense. This tells React to suspend rendering until the component is loaded. While the components are loading, we display fallback UIs to the user.
export default function Profile() {
  return (
    <>
      <React.Suspense fallback={<div>***Profile Image Fallback***</div>}>
        <ProfileImage />
      </React.Suspense>
      <React.Suspense fallback={<div>***Profile Details Fallback***</div>}>
        <ProfileDetails />
      </React.Suspense>
      <React.Suspense fallback={<div>***Profile Controllers Fallback***</div>}>
        <Controllers />
      </React.Suspense>
    </>
  );
}
Once the components are ready, React progressively reveals them in the UI, one by one. In the Profile component, the ProfileImage renders in 1 second, ProfileDetails in 2, and ProfileControllers in three (corresponding to the setTimeout values).
Example 5: Display Content All At Once Upon Loading
This is an alternative strategy to reveal content as it loads progressively. Instead, I display all content once upon loading, providing a different user experience.
This can be useful when presenting a fully loaded UI to the user to avoid confusion.
Implementation of Example 5
Let’s update the Profile page to render all its content together upon loading.
Here’s the updated Profile component. Check the codesandbox for my code source.
export default function Profile() {
  return (
    <>
      <React.Suspense fallback={<div>***Profile Fallback***</div>}>
        <ProfileImage />
        <ProfileDetails />
        <Controllers />
      </React.Suspense>
    </>
  );
}
In this pattern, I placed all three components (ProfileImage, ProfileDetails, and ProfileControllers) within a single React Suspense. This Suspense defines a common placeholder for all Profile’s nested components.
Since we are using only one React Suspense, it will wait for the slowest component to load. In my case, the slowest component (ProfileContollers) takes three seconds to load. A user will wait this time to see all the headings.
Is React Suspense Helpful for Managing Error Boundaries?
React Suspense “suspends” components rendering while components load. It is helpful to manage loading states and placeholder interfaces.
On the other hand, error handling catches JavaScript errors and also displays a fallback UI. But, this time, we show a placeholder to prevent the whole React app from crashing. Error boundaries differ from the React Suspense but can work together.
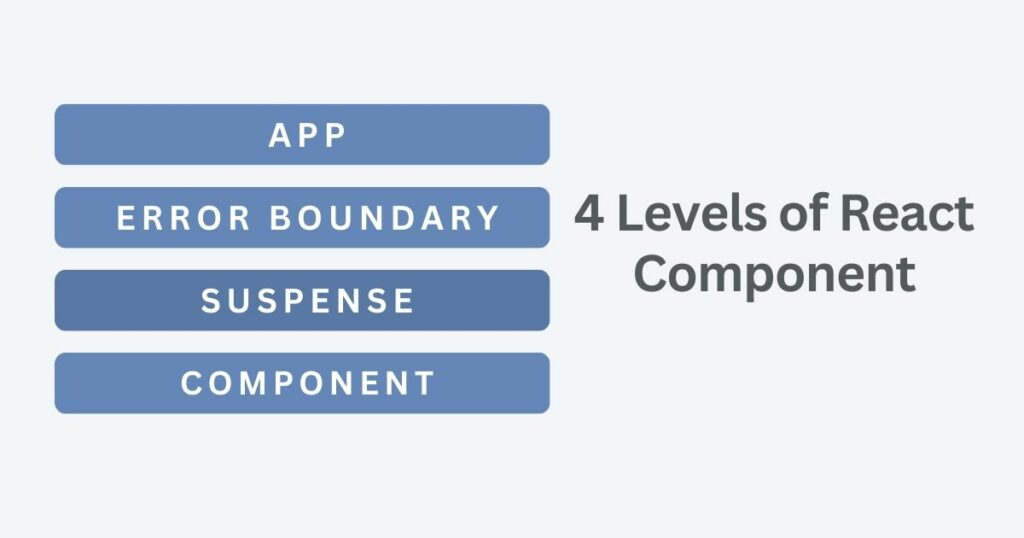
For example, I use Suspense to handle loading states and an error boundary to catch any errors during the data processing.
Not: Suspense is not responsible for handling errors! Instead, use it to manage loading states while fetching data.
Put error boundaries component alongside Suspense. This helps catch errors during data fetching and render fallback UIs as needed.
Conclusion: Suspense Provides Fallback Component For Data Loading
React Suspense isn’t just about loading placeholders — it’s about transforming how users interact with your app.
Suspense keeps your React 18, 17, or 16 app feeling fast and responsive! Even when dealing with asynchronous data, it ensures that users enjoy seamless content and engage even with complex UI.
I personally think that Suspense is incredibly useful. I use it regularly in projects, including commercial ventures, real-world applications, and personal pet projects.


